Building DrawKit #5: Building the Editor
A weekly series documenting building DrawKit
.png)


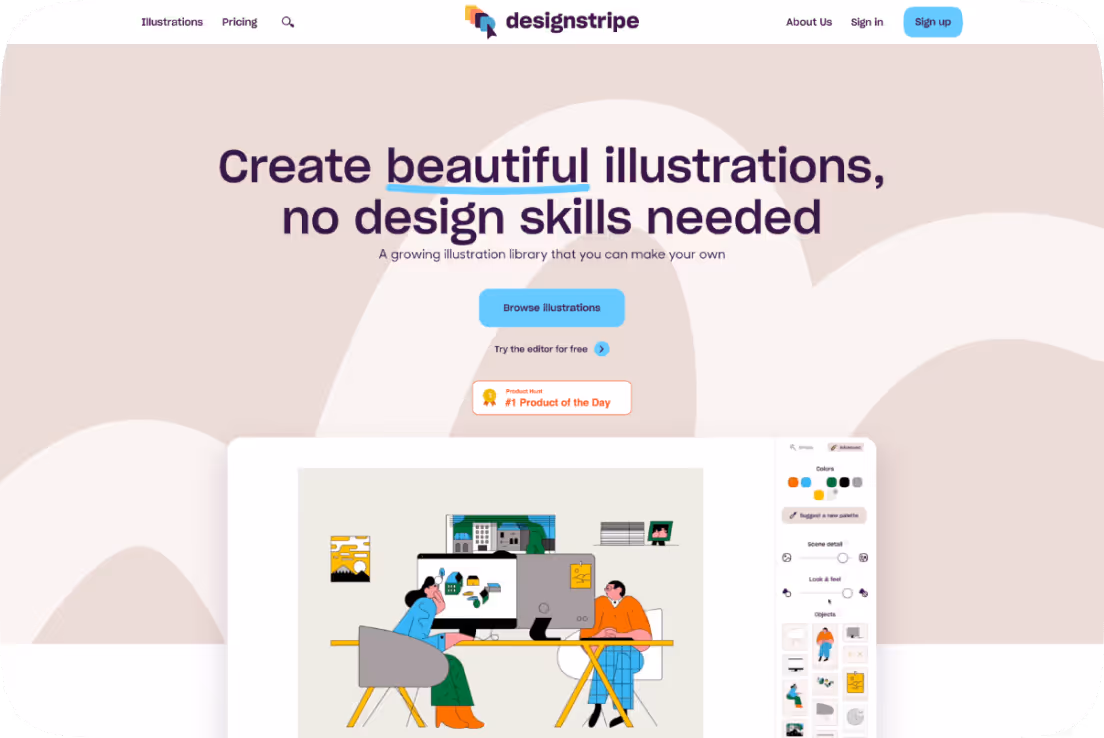
I spent most of the last week making the first parts of the editor functional, and it’s working! I’m having such a fun time clicking around and customising this first test illustration.
The big challenge this week, aside from the functionality itself, was working out an SVG format that allows for the edits I’m planning, but I think I have this working nicely now.
Here’s what’s currently working after this last week’s work:
- Shuffling colours
- One-click colour modes
- Canvas light/dark background
- Undo and redo
- A fun pixellate transition when moving between colour modes. Gotta add some fun in as I go.
Alongside the colour modes, if you used designstripe a few years ago you might find the look & feel slider familiar. This was one of my favourite features and I really wanted to revive it and explore it further.
Next will be scaling this to more illustrations and styles, and making sure the functionality I’ve built works beyond this single test illustration. I’m sure I’ll need to be making some adjustments.
I’m going to be spending a lot of time in Directus next to speed up asset management – once I have the flows and data structure working nicely in there I can more easily test the editing functions with a range of styles and packs.
Once that’s in place I’ll then be moving to the missing editor features: editing specific colour swatches, the slider, custom colour palettes, and saving edited states to the database.
Onward!


.avif)